Thursday, 12 May 2011

Wednesday, 4 May 2011
Red Temple 1.5
Ok, I hope I got this right!
Red Temple 1.5 is now available for download (in the right sidebar) or here.
Red Temple 1.5 is now available for download (in the right sidebar) or here.
Thursday, 7 April 2011
Perks
Perks allow you to customise your character further. Perks can be changed easily. After unlocking the Perk Menu by reaching Rank 3 you can activate/deactivate perks.
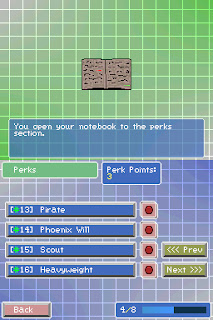
At first you will start with 3 perk points, this can eventually be increased. Look for a perk you like and click on it. you are given a description and the ability to activate or deactivate it.

You can change your perks as much as you want so use the right perks for the right job!
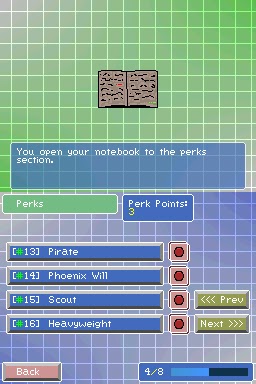
At first you will start with 3 perk points, this can eventually be increased. Look for a perk you like and click on it. you are given a description and the ability to activate or deactivate it.
You can change your perks as much as you want so use the right perks for the right job!
Level Stats
After failing a mission the following screen is shown.

You can see what you earned, although it will most likely be next to nothing. Even on a failed mission you can save a replay to watch later (watch replays from the 'Replay Menu' in 'Extra').

When saving a replay just select a slot to save it. You can save upto 4 different games. You can overwrite older games as much as you want.
The following screenshot shows a successful mission.

When a mission is successful you have a chance of a mission reward. If you are completing a mission for the first time you are given 2 recipes (assuming you have room to hold them). If you are completing a mission you have already done you have a percent chance of gaining an item. The item will be random based on your lootLevel, however for a mission reward your lootLevel is boosted slightly allowing you to get items you might not have gotten within a mission.

You can see what you earned, although it will most likely be next to nothing. Even on a failed mission you can save a replay to watch later (watch replays from the 'Replay Menu' in 'Extra').
When saving a replay just select a slot to save it. You can save upto 4 different games. You can overwrite older games as much as you want.
The following screenshot shows a successful mission.

When a mission is successful you have a chance of a mission reward. If you are completing a mission for the first time you are given 2 recipes (assuming you have room to hold them). If you are completing a mission you have already done you have a percent chance of gaining an item. The item will be random based on your lootLevel, however for a mission reward your lootLevel is boosted slightly allowing you to get items you might not have gotten within a mission.
Ingame
When on a mission you take control of a Slimoc. You use this slimoc to collect all the cherries, once you have collected them all the mission ends a success.

Some useful tips while playing:
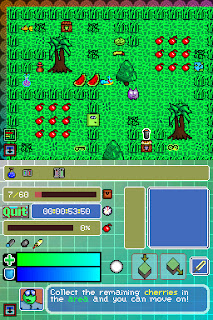
The top of the menu screen (switched by using the stylus at the bottom left) also allows you to use assigned items. (To assign an item to use in a mission you use the 'Item List' menu in extra). If you have some currently in your inventory it will show here (its hidden when you run out, but not unassigned).
Clicking on the item will present you with the following screen.

You can use the item or simply back out. NOTE: not all items are to your benefit. For example using a Lamp will summon an enemy Gobol, which are incredibly strong.
If your are having trouble navigating the levels check out the tutorials.
Action | Button | Description |
Movement | D-Pad or ABXY | Move in 4 directions. |
Attacking | L or R Shoulders | Different weapons will attack in different ways. Some weapons are more useful than others. |
Clicking | Stylus Press | By clicking onscreen with the stylus you can interact with things. Clicking a bomb while next to it picks it up. Clicking on an enemy with a gun will lock on the enemy. |
Change Direction | Stylus Press | A useful way to turning without moving is to click the stylus. The character will always point in that direction. If an enemy moves to much this will be useful to you. |

Some useful tips while playing:
- If you find you can't pick an item up chances are you have no room. You can only carry 9 in game items. You can drop some things to make room by dragging the item into the 2 arrow pics underneath the bag. One will drop the item in front, the other will drop it below your feet.
- If you cant drop an item it will be because that area of land is not empty. try moving and dropping it elsewhere.
- You can only have one powerform at a time. To pick another up you have to drop it. You can drop your powerform the same as the bag items. Dragging it onto the arrows. The powerform icon is the small circle to the right of your health and armour bars.
- The items shown above the health and armour bars are automatic items. They indicate they are active or you have some remaining.
- The tiny bag and bar to the left of it show your current status on inventory items. Once this is full items that fly into you are simply lost UNLESS it can stack with some currently held items.
- To the left of the ingame items you can see the specials collected. Specials last till the end of the mission or you drop them like items. You can carry upto 4 specials at any one time.
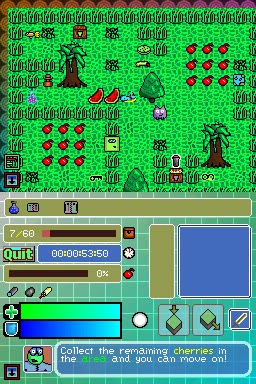
The top of the menu screen (switched by using the stylus at the bottom left) also allows you to use assigned items. (To assign an item to use in a mission you use the 'Item List' menu in extra). If you have some currently in your inventory it will show here (its hidden when you run out, but not unassigned).
Clicking on the item will present you with the following screen.
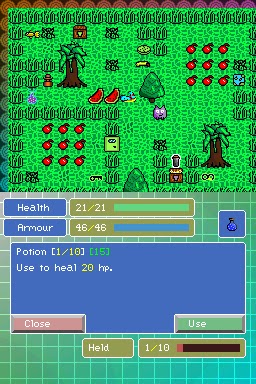
You can use the item or simply back out. NOTE: not all items are to your benefit. For example using a Lamp will summon an enemy Gobol, which are incredibly strong.
If your are having trouble navigating the levels check out the tutorials.
Level Select
The level select screen is shown from three types of level access, Story, Survival and Time Attack. Depending on the mode the upper image will change. The following screen shot shows story mode level select.

Starting the level:
To start a level simply navigate with the next and prev buttons then press on the picture to start that level.
Completed With:
The completed with button will present you with a box showing you what characters have completed that level.
Scores & Time:
You can also view your best time and score for that level. Unlike the other modes, survivals time is better the higher it is.
Watch Scene:
After clicking the picture to start a mission you are sometimes shown a cutscene like the screenshot shown below. To rewatch that scene you can click the 'Watch Scene' button.

Tap on the screen to move the scene along. Once you have watched it, re-pressing on the same level will take you to the mission.

Starting the level:
To start a level simply navigate with the next and prev buttons then press on the picture to start that level.
Completed With:
The completed with button will present you with a box showing you what characters have completed that level.
Scores & Time:
You can also view your best time and score for that level. Unlike the other modes, survivals time is better the higher it is.
Watch Scene:
After clicking the picture to start a mission you are sometimes shown a cutscene like the screenshot shown below. To rewatch that scene you can click the 'Watch Scene' button.

Tap on the screen to move the scene along. Once you have watched it, re-pressing on the same level will take you to the mission.
Wednesday, 6 April 2011
Inventory
Using the inventory you can

Clicking on an item will bring up some details on it.

Here you can see the options to sell or mix the item.
Selling:
When selling you have the option to sell a single item or the whole stack.

Mixing:
If you had clicking the mixing button you would have been given the following screen.

The top right shows the item you are mixing. You are able to browse the items as before to select the second item of the mix. Once you select the second item you have the option to choose a rock or make the mix.

If you have never made the mix before you cannot see the resulting item, it will simply show as Unknown. If you click the rock button you are taken to the item list again to select a rock to use. Rocks have different effects in mixing. Some mixes require a rock.
If you do know what will be made you are given the following screen.

Once you click make there are 3 possible consequences


- Browse your held items
- Use inventory items
- Mix items
- Enchant Items
- Sell items

Button | Description |
Prev 10 | Move 10 pages backwards |
Next 10 | Move 10 pages forwards |
Prev | Move 1 page backwards |
Next | Move 1 page forwards |
Sort | Sort the inventory (sorting is based on item ID) |
Back | Go back to the main menu |
Clicking on an item will bring up some details on it.
Here you can see the options to sell or mix the item.
Selling:
When selling you have the option to sell a single item or the whole stack.
Mixing:
If you had clicking the mixing button you would have been given the following screen.
The top right shows the item you are mixing. You are able to browse the items as before to select the second item of the mix. Once you select the second item you have the option to choose a rock or make the mix.
If you have never made the mix before you cannot see the resulting item, it will simply show as Unknown. If you click the rock button you are taken to the item list again to select a rock to use. Rocks have different effects in mixing. Some mixes require a rock.
Rock | Effect |
Red Rock | Enable the mixing of some items |
Yellow Rock | Gives a 10% change the ingredients aren’t consumed by the mix. |
Green Rock | Gives a 20% change the ingredients aren’t consumed by the mix. |
Blue Rock | Increases the min items possible by 1 (cannot exceed the max possible). |
Purple Rock | Increase the max items possible by 2. |
Rare Red Gem | Enable the mixing of some items |
Rare Yellow Gem | Enable the mixing of some items |
Rare Green Gem | Enable the mixing of some items |
Rare Blue Gem | Enable the mixing of some items |
Rare Purple Gem | Enable the mixing of some items |
Golden plate | Enable the mixing of some items |
If you do know what will be made you are given the following screen.
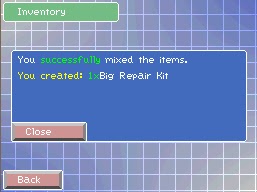
Once you click make there are 3 possible consequences
- You fail the mix because they aren't capable of mixing (items are not lost)
- You fail the mix because you don't have room for the resulting item in your inventory
- You succeed and create the item
Using an Inventory item:
Some items can be used from the inventory. If they can they will present an additional button on their description box. For example.
Different items have different effects. If the recipe is used the following message is displayed.
(NOTE: you don't have to write this down it will be placed in the 'Recipe List' which when unlocked is in the 'Extra' menu).
Enchanting:
You can make current items even stronger by enchanting them with attributes. You can enchant if the item meets the criteria:
- It's an equipment piece
- Its got 2 or less attributes
- It's not currently equipped
To enchant an item select the item ad you should see an enchant button:
Once you select the enchant button you are able to browse the item list. Now you have to select an enchant. (An example enchant is 'Note Of Vitality').
Once you have selected the enchant you can see the effect it will have. Once you click enchant the enchant item is used and the item becomes enchanted.
Enchanted items cannot stack with normal items even if they are the same item. For example the above Simple Gun cannot stack with a normal Simple Gun.
Disenchanting:
If you want the enchant back to use on another item you can disenchant the item. This will fail if you don't have room for either the normal version of the item or the enchant item.
Equipment
Equipment is used to increase your chances of success on a mission. There are 56 available attributes. Here are a few.
Note when an attribute on a piece of equipment is shown as yellow, its effects stack the more you get. Where white named attributes simply activate if you have a positive number of them.
For Example:
Item finder is a white named attribute. If you have 2 armour pieces with +1 and 1 armour piece with -1 you would activate the skill as you would be left with +1 Item Finder.
However if you removed the -1 piece and had +2 Item Finder the effects would not increase.
Life Leech is a yellow named attribute. Its value is the percentage is uses. +10 LifeLeech drains 10% where as +15 drains 15%.
Changes:
Some attribute change based on conditions. For example Cracked armour gives a chance for you to take double damage, and this chance increases by 4% for every piece of equipment you have with the wornout attribute.
Another example would be Treasure Hunter which increase your loot level. The loot level given is based on your current rank (attrBase + (7 * currRank)).
Equipping:
Using the equipment menu allows you to change your gear and view whats currently equipped.

You can review your stats on the upper screen. However if you want a list of attibutes gained from equipment simply press the 'Attributes' button in the top right.

If you click on an equipment piece on the equipment screen it will present you with the following lower screen.

Allowing you to remove or change the equipment slot with another item.
Set Bonuses:
Some equipment pieces belong to sets. The image above shows a helmet piece called 'Basic Cap' and you can see it belongs to the set 'Basic'.
Equipping all pieces of a set will grant you its set bonus. (you can view the bonus before gaining it by clicking on the yellow button naming the set).
If you remove a piece that breaks the set you lose the attributes of the item and the set. Some armour pieces are only effective when worn as a set. However some set pieces can be mixed and matched, you just wont get the bonus.
Name | Description |
Health | Increases your health. |
Armour | Increases your armour. |
Item Finder | Increases items found. |
Rebirth | Gives a 6% chance to resurrect you at 15% health and armour when you die. |
Life Leech | Drain and heal a percentage of damage done. |
Parry | Gives you a 5% chance to take no damage. |
Note when an attribute on a piece of equipment is shown as yellow, its effects stack the more you get. Where white named attributes simply activate if you have a positive number of them.
For Example:
Item finder is a white named attribute. If you have 2 armour pieces with +1 and 1 armour piece with -1 you would activate the skill as you would be left with +1 Item Finder.
However if you removed the -1 piece and had +2 Item Finder the effects would not increase.
Life Leech is a yellow named attribute. Its value is the percentage is uses. +10 LifeLeech drains 10% where as +15 drains 15%.
Changes:
Some attribute change based on conditions. For example Cracked armour gives a chance for you to take double damage, and this chance increases by 4% for every piece of equipment you have with the wornout attribute.
Another example would be Treasure Hunter which increase your loot level. The loot level given is based on your current rank (attrBase + (7 * currRank)).
Equipping:
Using the equipment menu allows you to change your gear and view whats currently equipped.

You can review your stats on the upper screen. However if you want a list of attibutes gained from equipment simply press the 'Attributes' button in the top right.

If you click on an equipment piece on the equipment screen it will present you with the following lower screen.
Allowing you to remove or change the equipment slot with another item.
Set Bonuses:
Some equipment pieces belong to sets. The image above shows a helmet piece called 'Basic Cap' and you can see it belongs to the set 'Basic'.
Equipping all pieces of a set will grant you its set bonus. (you can view the bonus before gaining it by clicking on the yellow button naming the set).
If you remove a piece that breaks the set you lose the attributes of the item and the set. Some armour pieces are only effective when worn as a set. However some set pieces can be mixed and matched, you just wont get the bonus.

Extra
The extra button on the main menu will bring you to another menu with more options. Many of which will start locked. You will unlock them throughout the game.


- | Description | Unlocked |
Options | Change game options | Starts unlocked |
Bios | Look at char/enemy bios | Complete medal [Killer] |
Character Select | Change current character | Complete medal [Shopping Addict] |
Time Attack | Play time attack mode | Buy from the shop |
Survival | Play survival mode | Buy from the shop |
Recipe List | List all recipes completed/found. | Complete medal [Experiement] |
Item List | List of items you’ve seen at least once | Starts unlocked |
Attribute List | View all available attributes for equipment and charms | Starts unlocked |
Replay | Replay your saved games | Starts unlocked |
Audio List | Play select audio files from the game | Complete medal [Casual] |
Shop
The shop is a great place to spend your gold. Here are some of the items sold there.


Name | Cost | Rarity | Description |
Potion | 35 | 0 | Use to heal 20 hp. |
Repair Kit | 65 | 5 | Repair 35 ar. |
Power Pill | 250 | 92 | Causes you to enrage. While enraged deal 10 damage to enemies on contact. Lasts 16.7 sec. |
5000 | 500 | Automatically resurrect at 20% health and armour. | |
Iron Bar | 250 | 23 | Common crafting material. |
Apple | 1500 | - | Permanently increase your maximum health and armour by 15 points. |

Browse the items and click on something you're interested in to bring more details up.

If the buy button does not show you may be lacking funds or be holding too many of that item already. You many also have run out of inventory space. Your inventory space is increased throughout the game. However an items stack value never changes.
Medals
Medals are collected by completing certain conditions.

When a medal is complete you are given access to its reward. Collect the reward by locating the medal in the Medal List (found on the main menu) and selecting the reward button. A little present image is shown next to medal with uncollected rewards.

Some items can only be obtained through completing medals.
Also note after completing a medal it may unlock a new medal to complete. Sometimes medals may chain unlock up to 5 times.


Also note after completing a medal it may unlock a new medal to complete. Sometimes medals may chain unlock up to 5 times.
Tutorials
Tutorials allow you to play some simple levels. This will ease you into the game. Your will also earn some gold and recipes for each tutorial you complete assuming you have room in your inventory.

Tutorials are best played when you start the game for the first time. Completing all the tutorials is also one of the 8 stars.
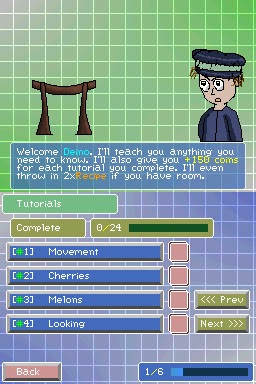
Tutorials are best played when you start the game for the first time. Completing all the tutorials is also one of the 8 stars.
Stats Screen
The stats screen allows you to view some information on your file.


- | Description |
Name | This is the name of you. |
Char | This is the name of your character. |
HP | This is your current health; the brackets show how much is attributed from equipments, charms, and bonuses. |
AR | This is your current armour; the brackets show how much is attributed from equipments, charms, and bonuses. |
DM | This is your current damage; the brackets show how much is attributed from equipments, charms, and bonuses. |
B.Pts | This stands for best points. This shows your highest points scored on a level. |
Kills | This is your total number of kills in the game. |
Died | This is how many times you’ve died in the game. (A death is still counted even if you are resurrected by an Attribute/Perk or item). |
Heal | How much your have healed in total throughout the game. |
Take | How much damage your have taken throughout the game. |
Games | Number of games you have played (whether or not you lost/won or quit). |
LootLevel | Your current loot level. The higher this is the better items you will find. Your loot level increases from the following sources
Your loot level is also boosted temporarily at certain times.
Chests:
|
Title | Your current title. Based on your rank. |
Rank | Your current rank. Rank up by earning EXP. |
Exp | EXP or experience is earned through completing missions, certain medals and using special items. |
Playtime | Your files playtime. Hour : Mins : Seconds : Hundredth |
Subscribe to:
Posts (Atom)